

Add New), then replace each [IMAGE-X] placeholder with the actual image block from the uploaded media. 2. Go to Posts > Add New > Code editor 3. Paste this code, then switch to Visual editor to insert images ==================================================== –>
How to Publish Your App on Google Play Console — A Step-by-Step Guide
Google Play Console is the official platform where Android and Flutter developers manage, test, and publish their apps to the Play Store. This guide walks you through every step — with real screenshots — so you know exactly what to expect.
Step 1 — The Dashboard: Your Apps Overview
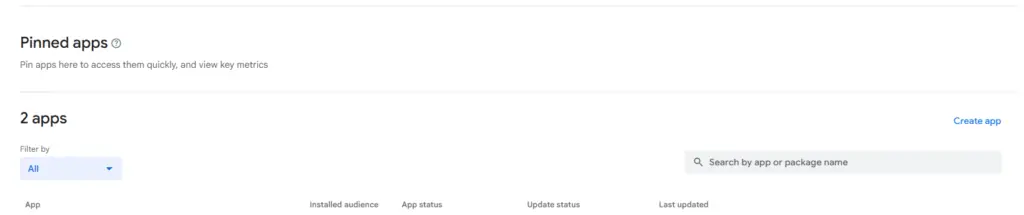
When you log into Google Play Console, you land on the main dashboard. Here you can see all your published and in-progress apps. You can also pin your most important apps for quick access, and view key metrics at a glance. To start publishing a new app, click Create app in the top right corner.
Step 2 — Create Your App
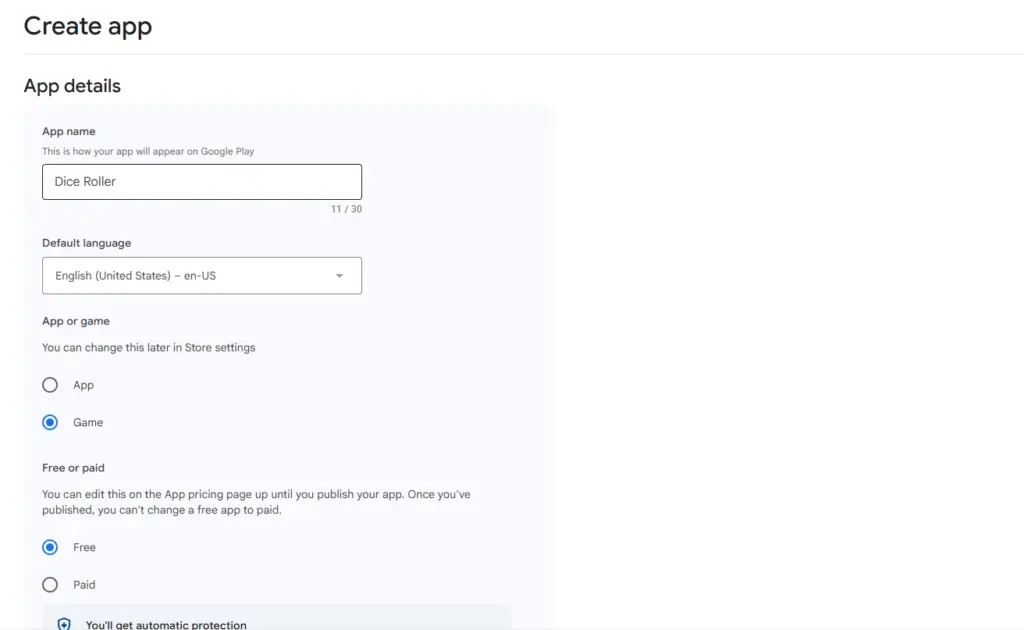
Click Create app and you’ll be taken to a setup form. Fill in the following details:
- App name: The name that will appear on Google Play (max 30 characters)
- Default language: The primary language for your store listing
- App or Game: Choose whether your app is an app or a game — you can change this later
- Free or Paid: Important — once you publish as free, you cannot switch to paid
Once you’ve filled everything in, accept the developer policies and click Create app.
Step 3 — The App Dashboard: Getting Ready to Publish
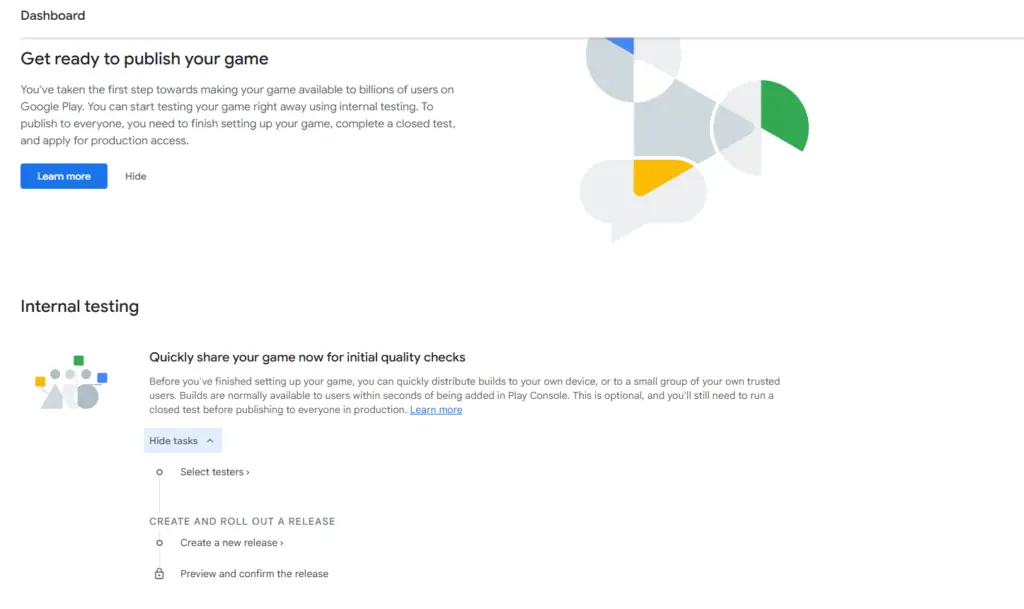
After creating your app, you’ll land on its dashboard. Google Play Console breaks the publishing process into clear stages. The first stage is Internal testing — where you can share your app with a small group before going public.
The dashboard shows you a checklist of tasks to complete before you can go live. Start with Internal testing to do early quality checks on your own devices.
Step 4 — Fill In Your App Information
Before you can publish, you need to complete the “Finish setting up your game” checklist. This includes two main sections:
Let Us Know About the Content of Your App
- Privacy policy — a required URL linking to your privacy policy page
- App access — does your app require login or special access?
- Ads — does your app contain ads?
- Content rating — complete a questionnaire to get your age rating
- Target audience — who is your app designed for?
- Data safety — what data does your app collect and how is it used?
Manage How Your App Is Organized and Presented
- Select an app category and provide contact details — choose your category and add a support email
- Set up your store listing — add your app name, description, icon, screenshots, and feature graphic
Step 5 — Closed Testing
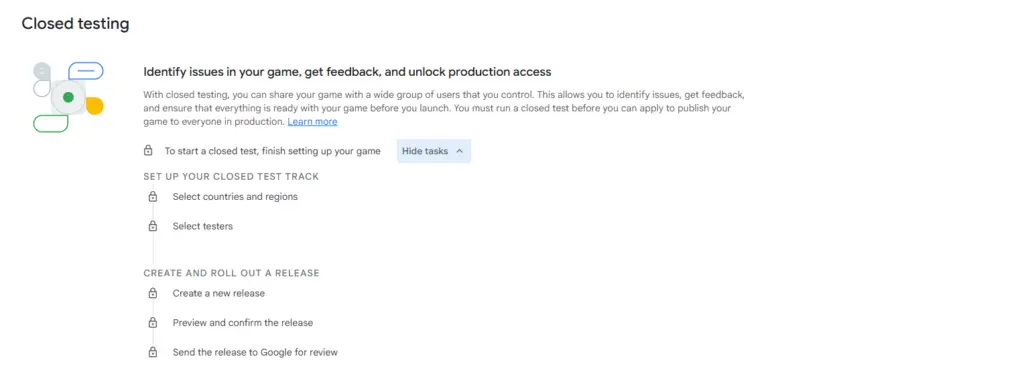
Once your app information is complete, the next stage is Closed testing. This is where you share your app with a wider, controlled group of testers. Closed testing is mandatory before applying for production access.
To set up your closed test, you need to:
- Select countries and regions where the test will run
- Select your testers (via email list)
- Create a new release and upload your APK or AAB file
- Preview and confirm the release
- Send the release to Google for review
Step 6 — Applying for Production Access
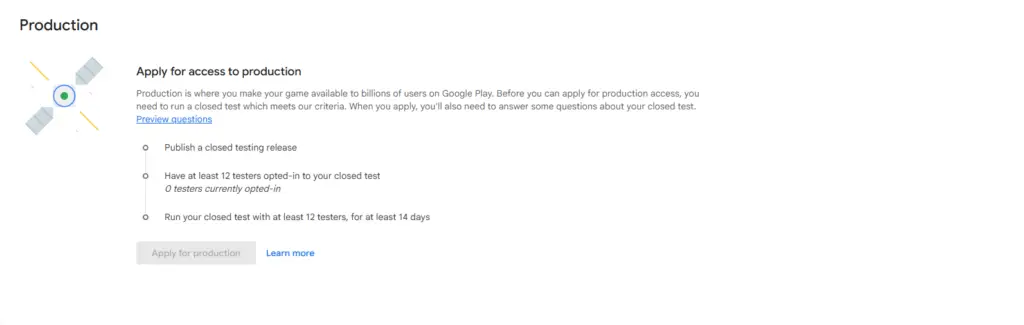
After completing your closed test, you can apply to publish your app to Production — making it available to everyone on Google Play.
To qualify for production access, you must:
- Publish a closed testing release
- Have at least 12 testers opted-in to your closed test
- Run the closed test for at least 14 days
Once all conditions are met, the Apply for production button becomes active.
Step 7 — Managing Testers for Internal Testing
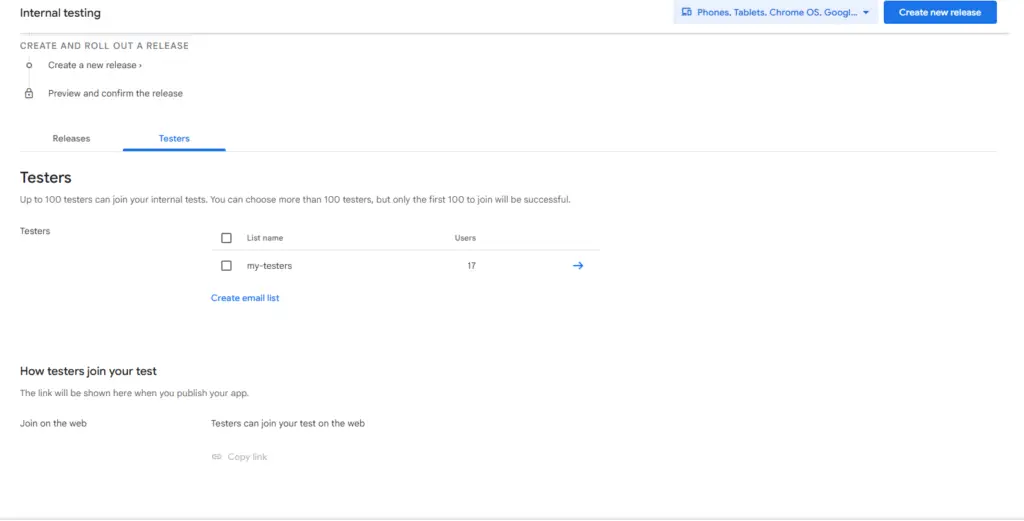
In the Testers tab of Internal testing, you can create email lists of people who will be able to download and test your app before it goes public. Up to 100 testers can join internal testing.
Click Create email list, add your testers’ Gmail addresses, and save. Once a release is published to internal testing, your testers will receive a link to download the app directly.
Step 8 — Creating a New Release
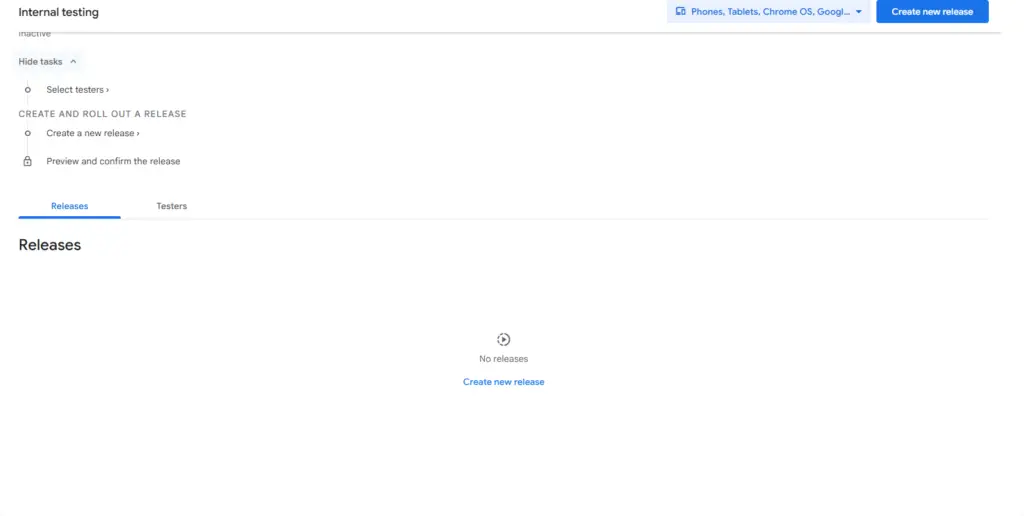
In the Releases tab, you’ll see a list of all your releases. If it’s your first time, the list will be empty. Click Create new release to upload your app’s AAB (Android App Bundle) file, set a release name, and add release notes.
After uploading, Google will review your release and notify you when it’s approved and live for your testers.
Summary: The Full Publishing Flow
- Create your app in Play Console
- Fill in all required app information and store listing
- Run an internal test on your own devices
- Set up a closed test with at least 12 testers for 14+ days
- Apply for production access
- Go live on Google Play 🎉
The process takes time, but following each step carefully ensures your app meets Google’s quality standards and is ready for millions of users.